# Step 1: Create HubSpot Form
Create a **HubSpot form** that Surface submits to when leads complete or drop off your Surface form. Make every field **optional except email**, so a partial submission (a lead who enters their email and leaves) still creates a valid form response in HubSpot for your automation to enroll.
Already have a HubSpot form? See [Step 1: Configure HubSpot Form](https://www.withsurface.com/docs/guides/hubspot-forms/configure-hubspot-form) for how to make its existing fields optional.
## Create a New Form in HubSpot [#create-a-new-form-in-hubspot]
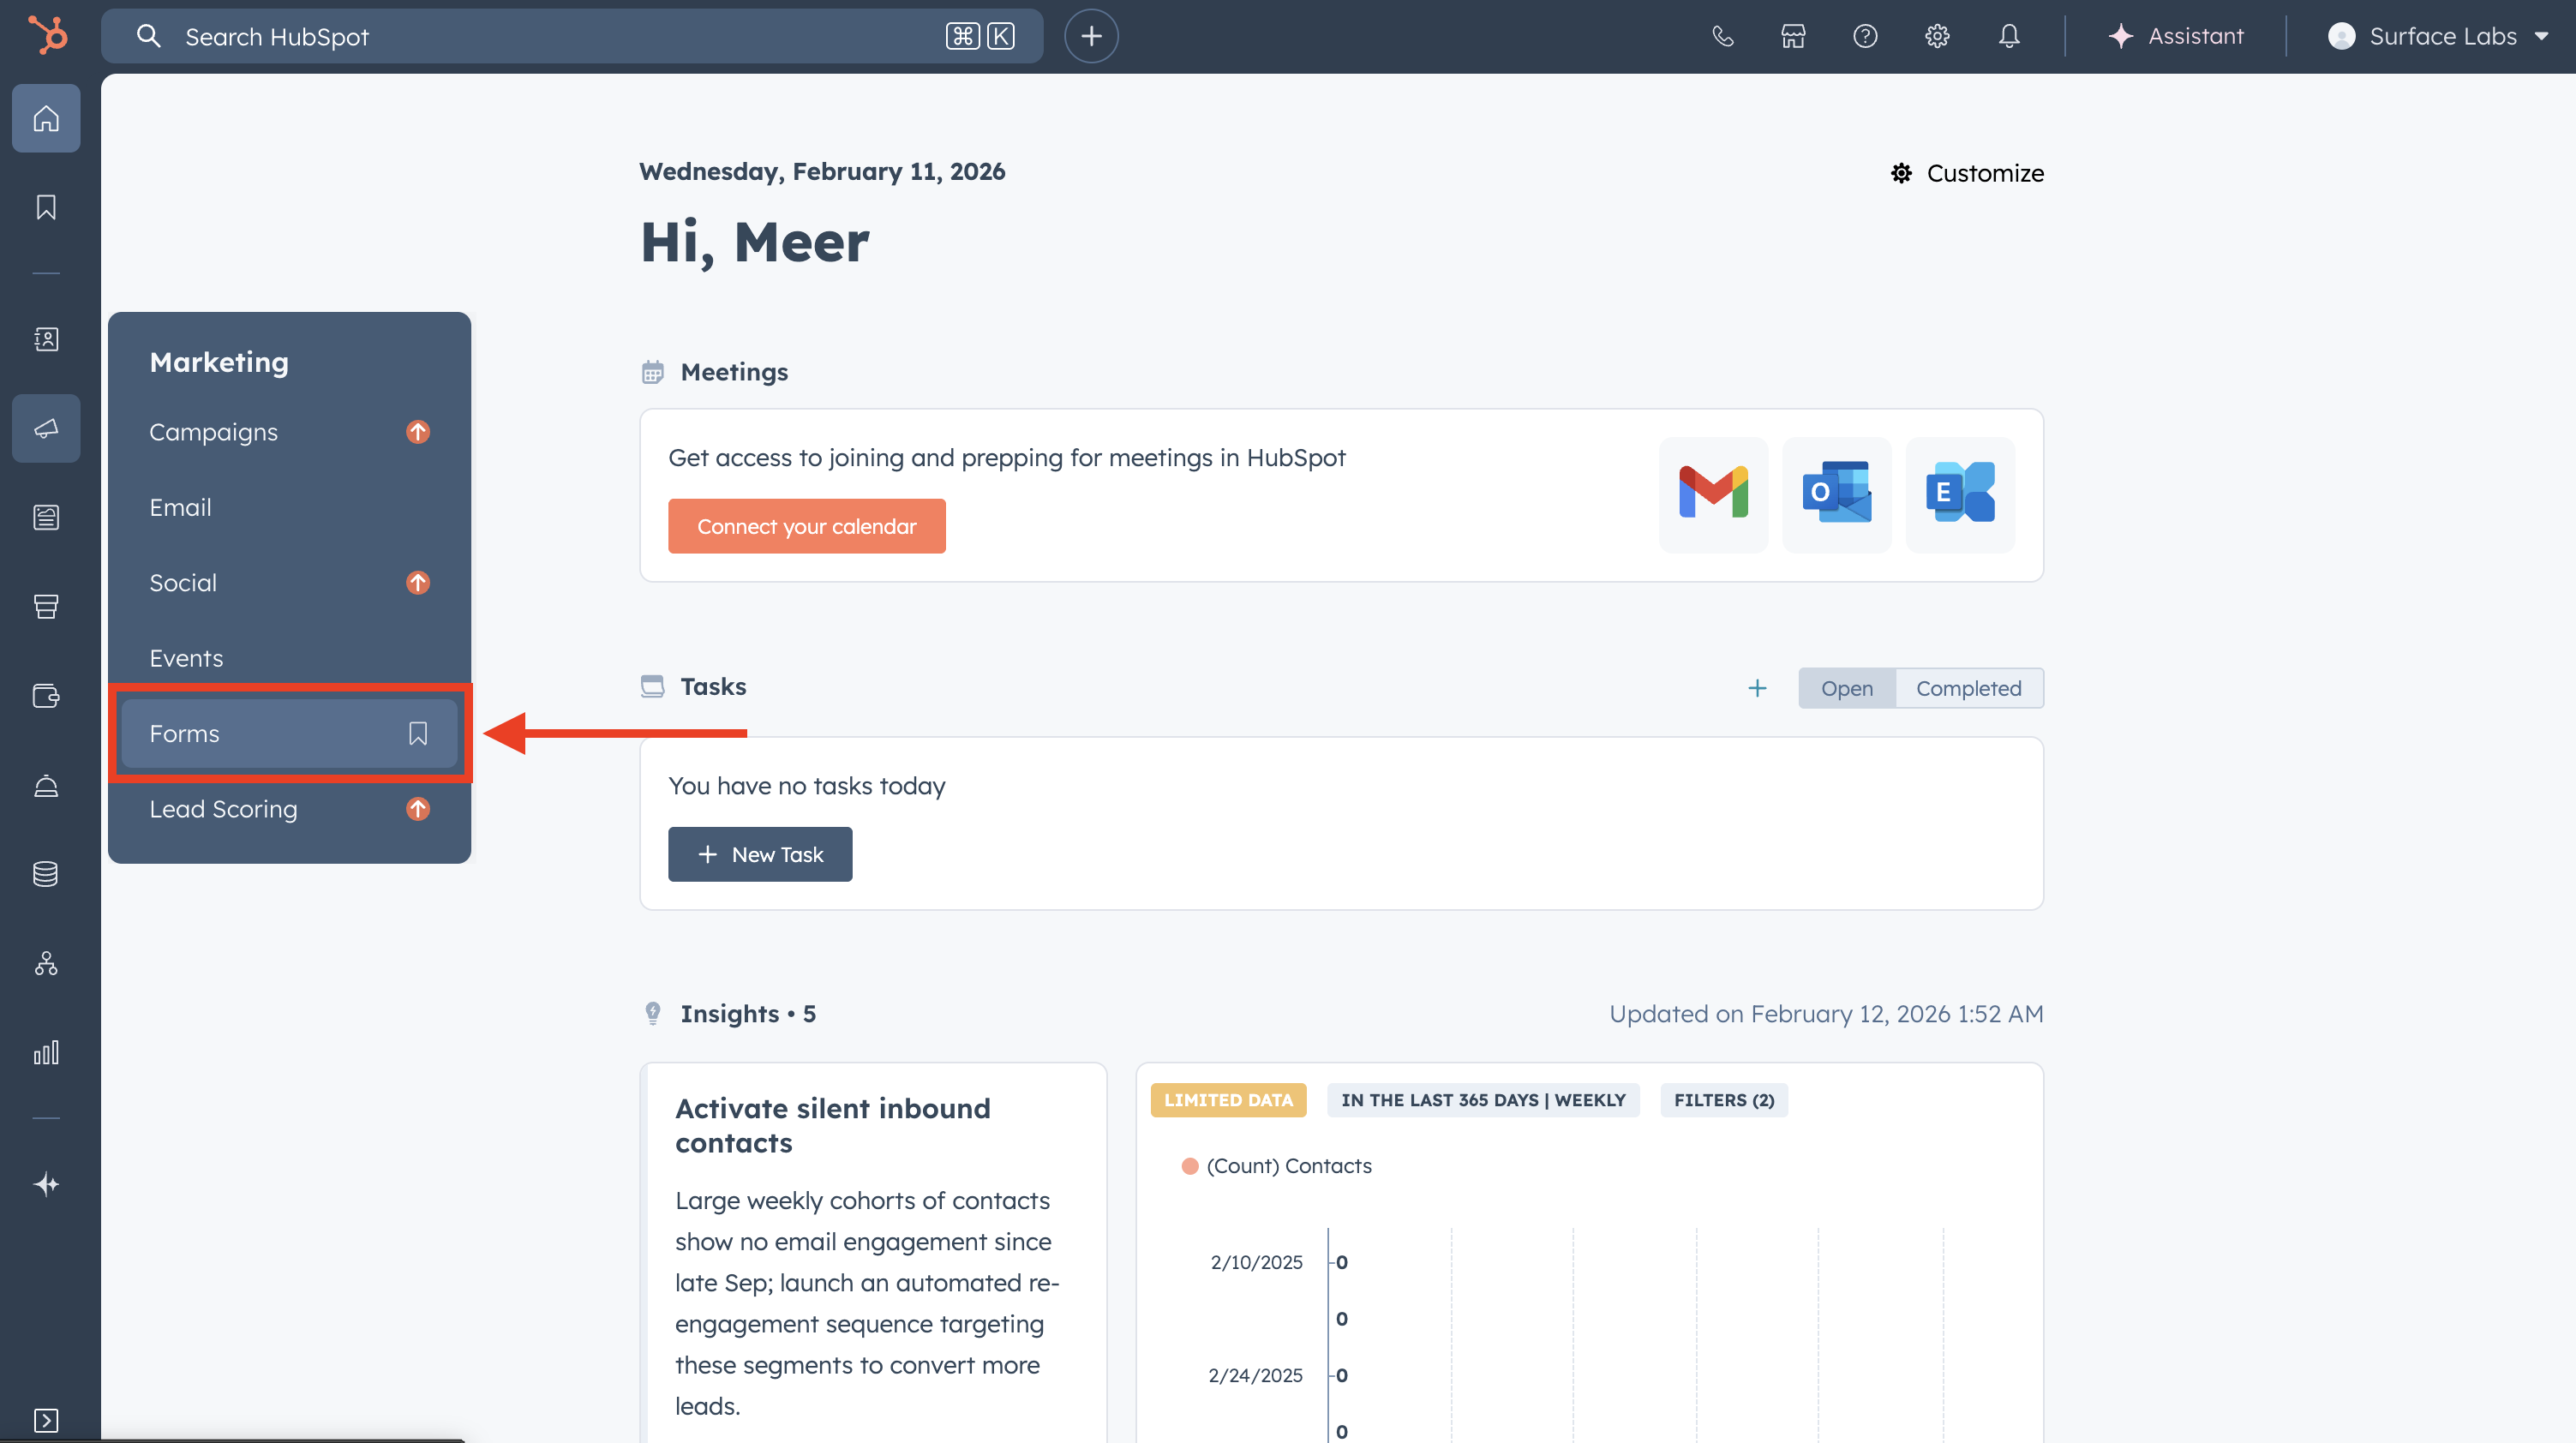
1. In HubSpot, go to **Marketing** → **Forms** (or **Marketing** → **Lead Capture** → **Forms** depending on your HubSpot layout)
2. Click **Create form** and choose **Embedded** (or the form type that fits your use case)
3. Name the form (e.g., "Surface - Email sequence enrollment")
 ## Set Fields: Email Required, Rest Optional [#set-fields-email-required-rest-optional]
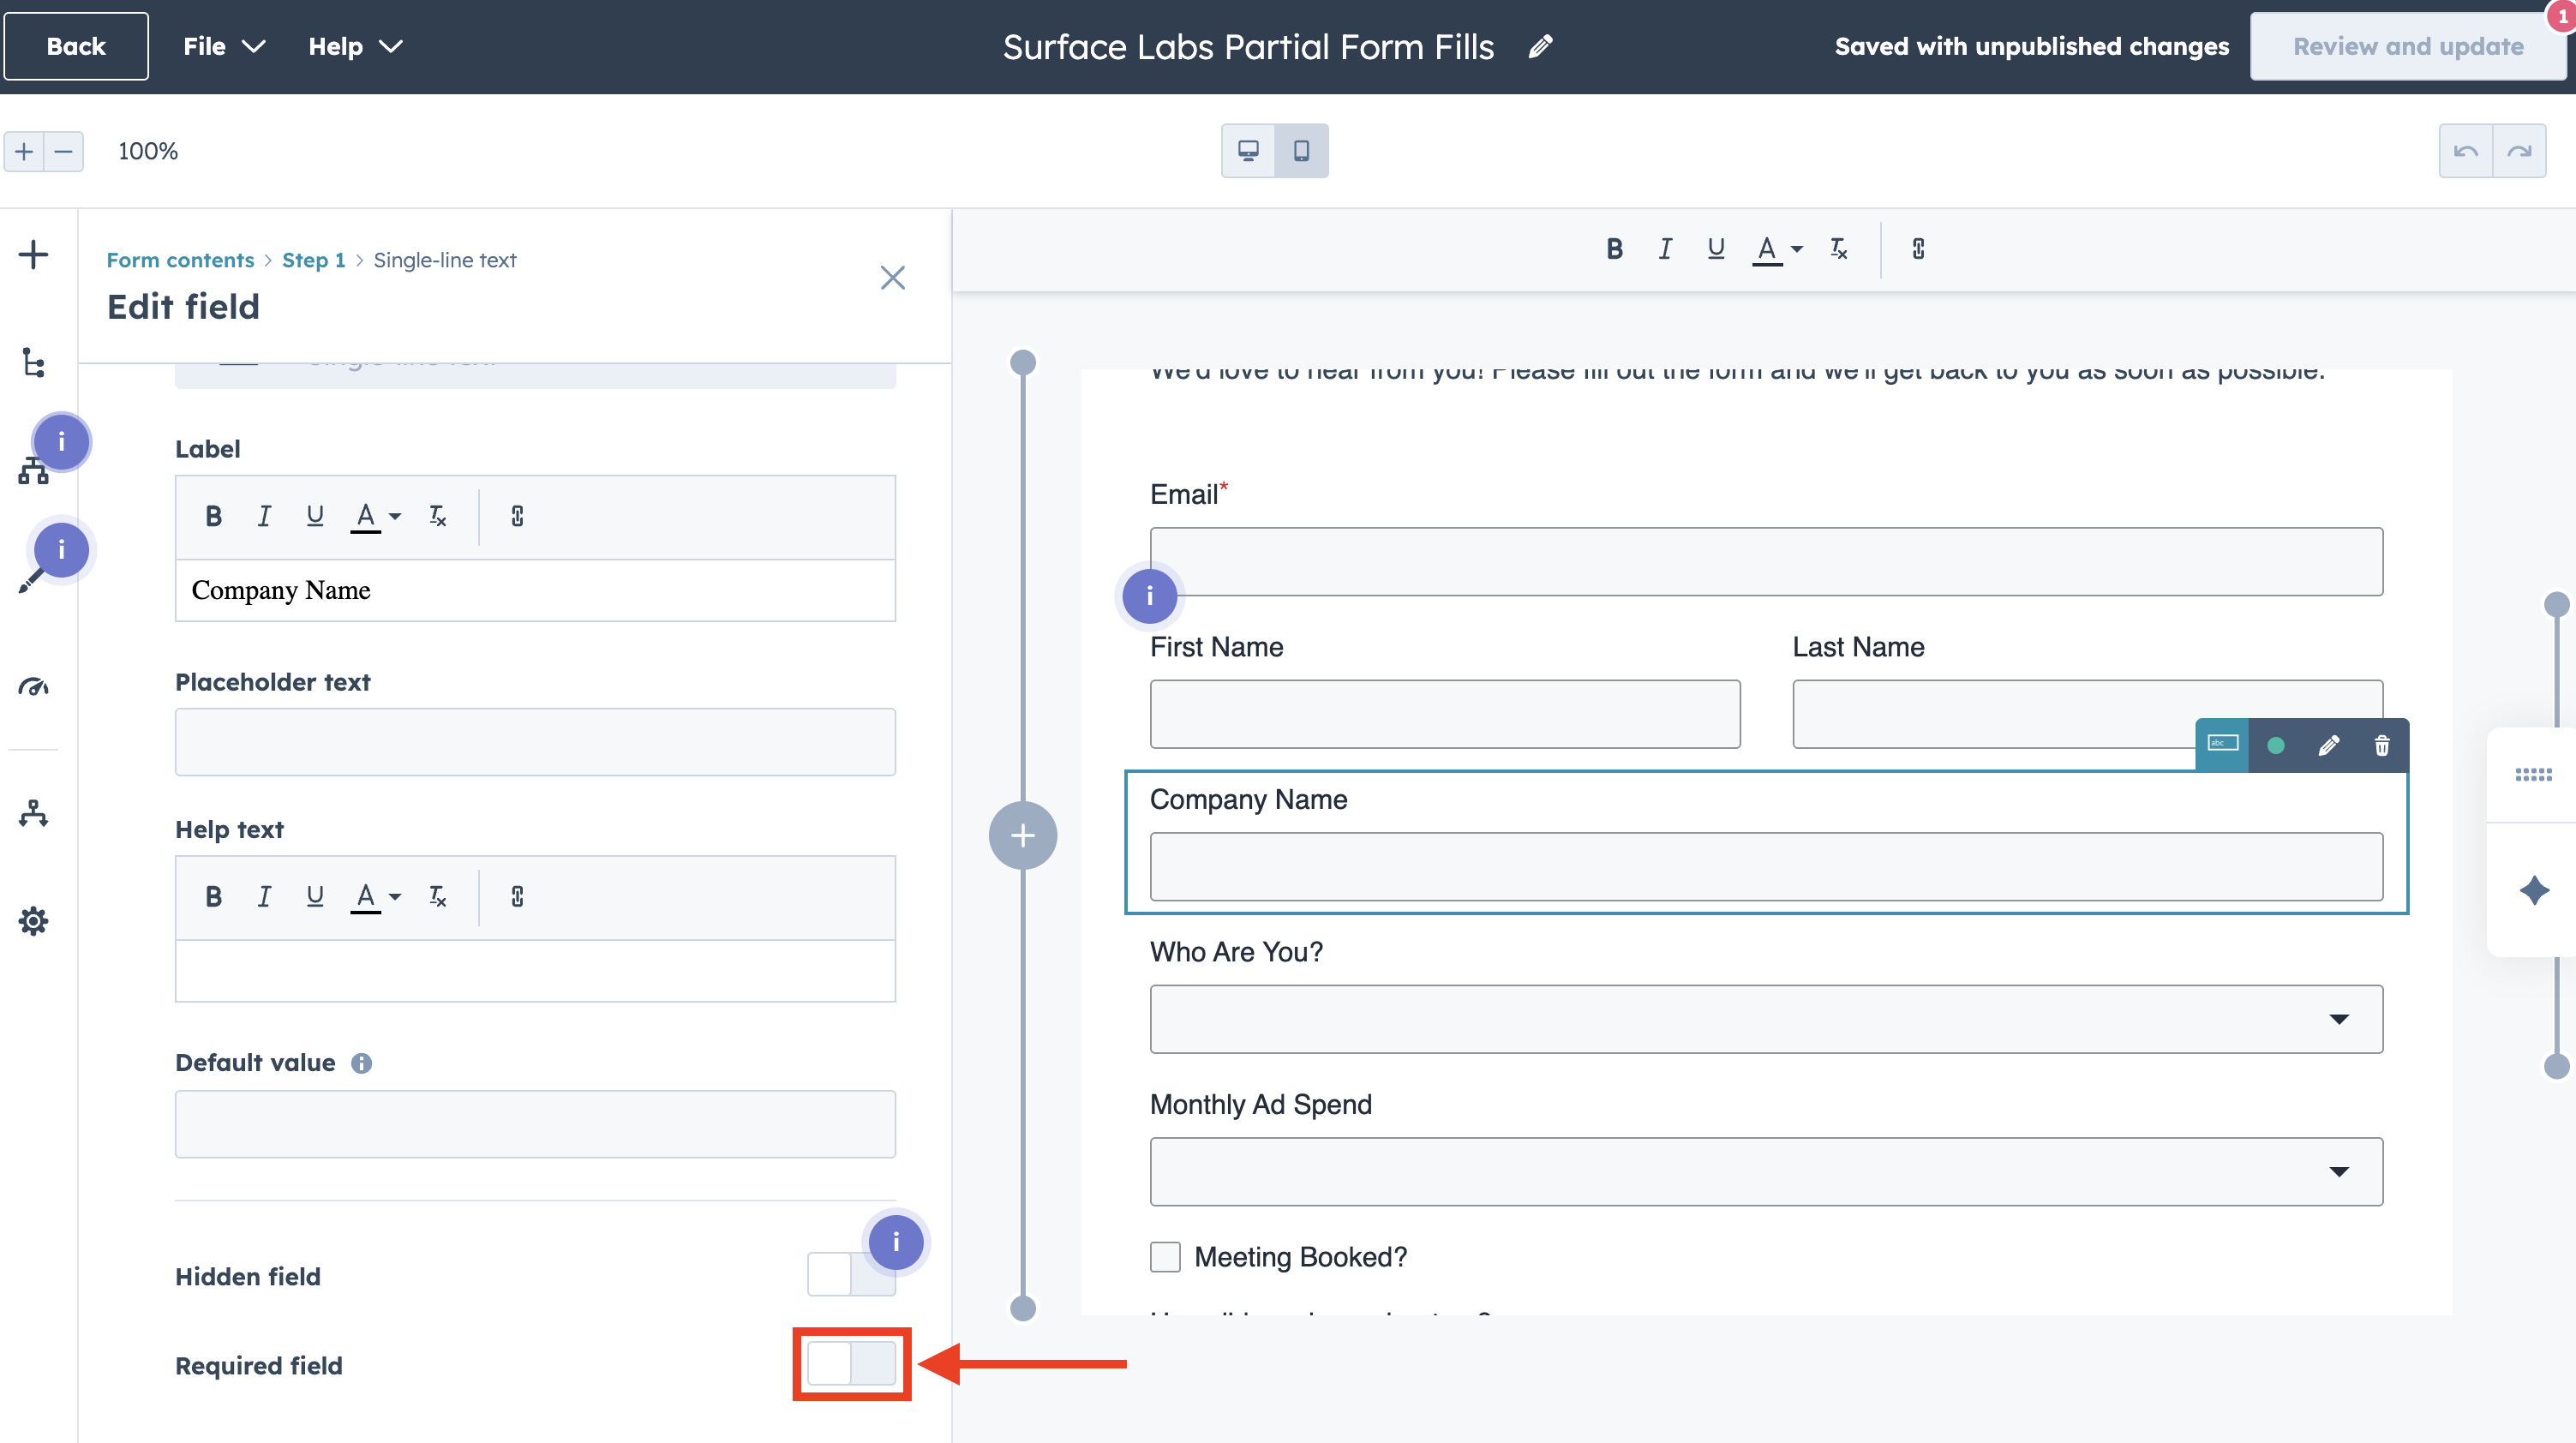
1. Add the fields you want to capture (e.g., **Email**, **First name**, **Last name**, **Company**)
2. For **Email**: keep it **required** so every submission has at least an email for the sequence
3. For **all other fields**: set them to **optional** (not required), so partial submissions from Surface are accepted
## Set Fields: Email Required, Rest Optional [#set-fields-email-required-rest-optional]
1. Add the fields you want to capture (e.g., **Email**, **First name**, **Last name**, **Company**)
2. For **Email**: keep it **required** so every submission has at least an email for the sequence
3. For **all other fields**: set them to **optional** (not required), so partial submissions from Surface are accepted
 Match these fields to the ones you map in your Surface workflow. Use the same **internal names** (e.g., `email`, `firstname`, `lastname`) when configuring [Create Form Response](https://www.withsurface.com/docs/guides/hubspot-forms/configure-workflow#map-surface-form-fields-to-hubspot-form-fields) so data lines up with your sequence personalization tokens.
## Connect Properties and Publish [#connect-properties-and-publish]
1. Ensure each form field is **connected** to the correct HubSpot contact property (e.g., Email → `email`, First name → `firstname`)
2. Complete any other form settings (thank-you message, redirect, etc.)
3. **Publish** the form
You don't need to embed this form on a page. Surface will submit to it via the API when you configure the workflow in [Step 5: Connect HubSpot Form with Surface Workflow](https://www.withsurface.com/docs/guides/email-sequences-hubspot/step-5-surface-workflow). Note the form name so you can select it in Step 4 (automation) and Step 5 (Surface workflow).
## Next Step [#next-step]
[Step 2: Create HubSpot Sequence](https://www.withsurface.com/docs/guides/email-sequences-hubspot/step-2-hubspot-sequence), with the first email template, personalization tokens, and a meeting link.
You'll connect this form to Surface in [Step 5](https://www.withsurface.com/docs/guides/email-sequences-hubspot/step-5-surface-workflow). Steps 2-4 are done in HubSpot (sequence and automation) first.
Match these fields to the ones you map in your Surface workflow. Use the same **internal names** (e.g., `email`, `firstname`, `lastname`) when configuring [Create Form Response](https://www.withsurface.com/docs/guides/hubspot-forms/configure-workflow#map-surface-form-fields-to-hubspot-form-fields) so data lines up with your sequence personalization tokens.
## Connect Properties and Publish [#connect-properties-and-publish]
1. Ensure each form field is **connected** to the correct HubSpot contact property (e.g., Email → `email`, First name → `firstname`)
2. Complete any other form settings (thank-you message, redirect, etc.)
3. **Publish** the form
You don't need to embed this form on a page. Surface will submit to it via the API when you configure the workflow in [Step 5: Connect HubSpot Form with Surface Workflow](https://www.withsurface.com/docs/guides/email-sequences-hubspot/step-5-surface-workflow). Note the form name so you can select it in Step 4 (automation) and Step 5 (Surface workflow).
## Next Step [#next-step]
[Step 2: Create HubSpot Sequence](https://www.withsurface.com/docs/guides/email-sequences-hubspot/step-2-hubspot-sequence), with the first email template, personalization tokens, and a meeting link.
You'll connect this form to Surface in [Step 5](https://www.withsurface.com/docs/guides/email-sequences-hubspot/step-5-surface-workflow). Steps 2-4 are done in HubSpot (sequence and automation) first.