# Send Data to Airtable
Connect your Surface form to Airtable with a webhook, so every submission creates a new record in your base.
## Prerequisites [#prerequisites]
You need:
* A Surface Forms account with a form created
* An Airtable account and base set up
* Admin access to both platforms
## Step 1: Create Your Form and Airtable Project [#step-1-create-your-form-and-airtable-project]
1. In Surface Forms, create your form if you haven't already
2. In Airtable, create a new base or use an existing one
3. Set up your table with columns that match the data you want to receive from your form
Make sure your Airtable column names are clearly defined, as you'll need to reference them later in the webhook payload.
## Step 2: Set Up Airtable Automation [#step-2-set-up-airtable-automation]
1. In your Airtable base, click on the **Automations** tab
2. Click **Create Automation**
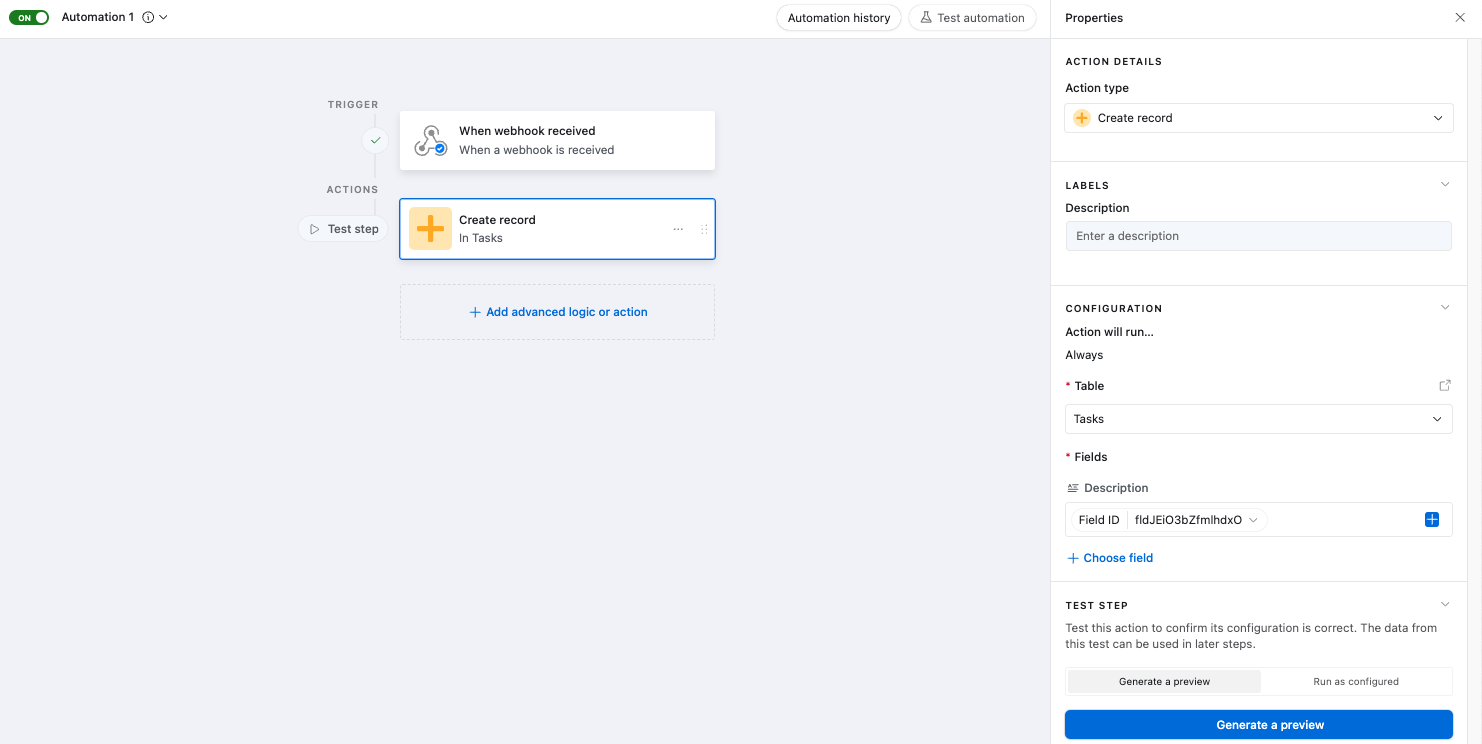
3. Select **When webhook received** as your trigger
4. Add a second action step by clicking the **+** button
5. Choose **Create Record** as your action
6. Configure the Create Record action:
* Select your target table
* Map the incoming webhook fields to your table columns
7. Save the automation and copy the webhook URL
 You can also use the [Airtable API](https://airtable.com/developers/web/api) to create records programmatically.
Keep your webhook URL secure - anyone with this URL can send data to your Airtable base.
## Step 3: Configure Surface Forms Workflow [#step-3-configure-surface-forms-workflow]
1. Open the Surface Forms Workflow Builder
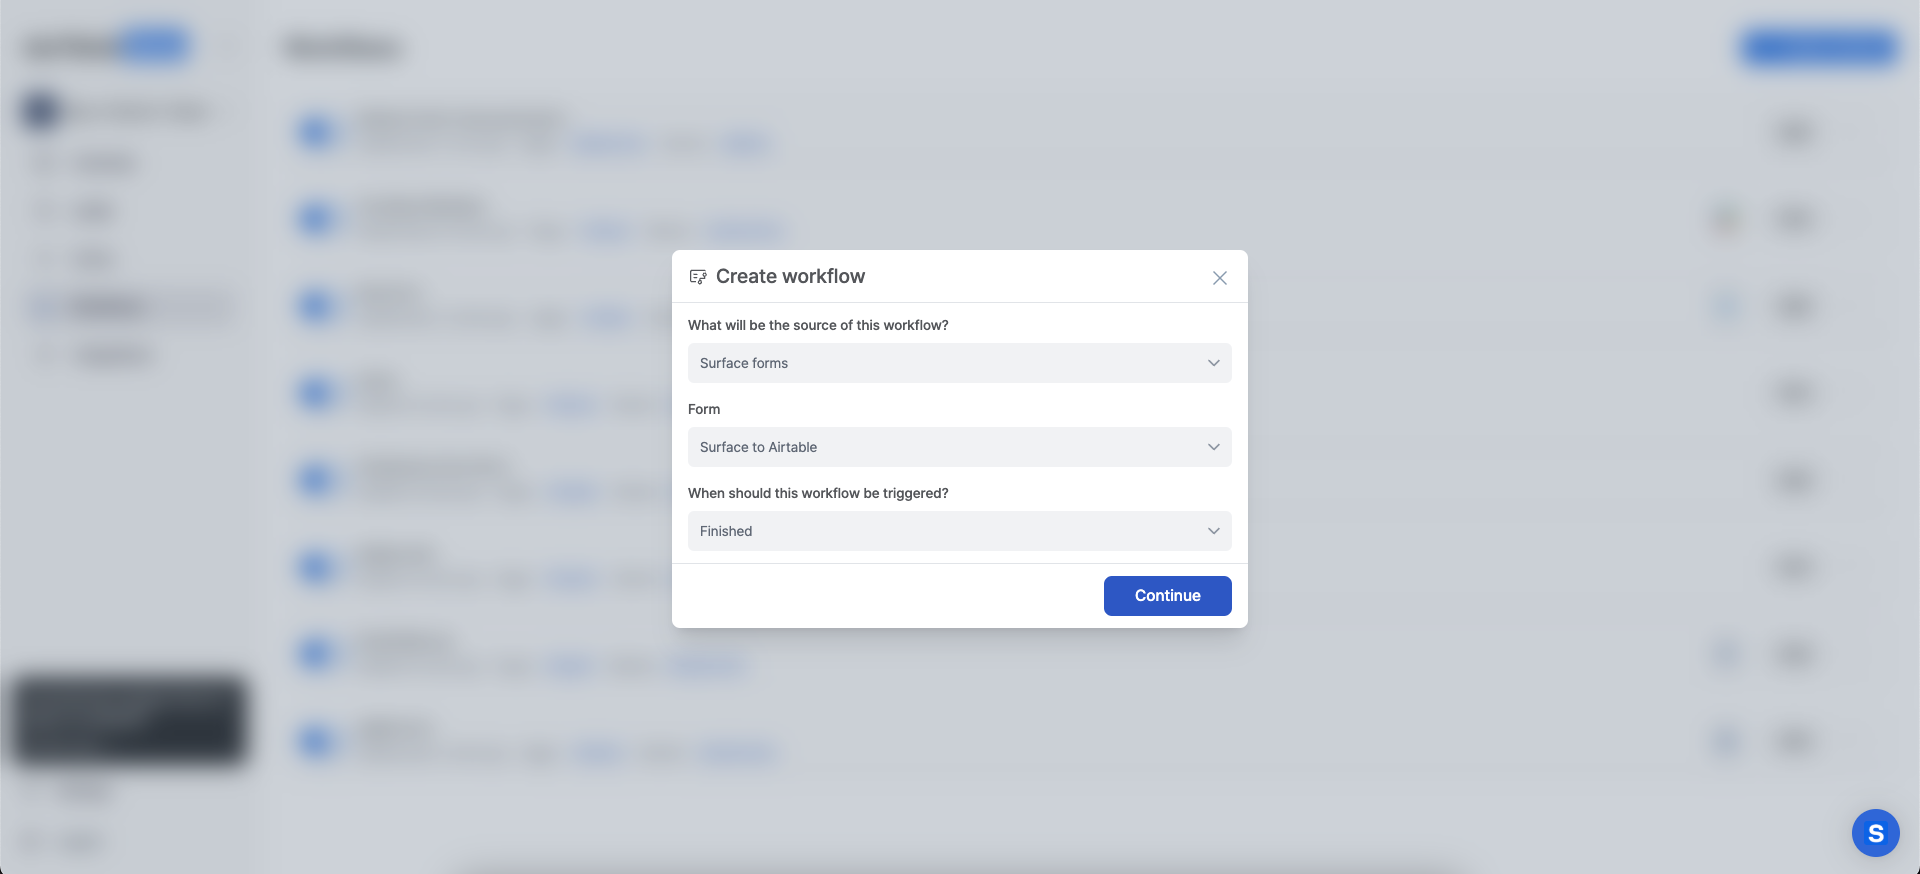
2. Create a new workflow:
You can also use the [Airtable API](https://airtable.com/developers/web/api) to create records programmatically.
Keep your webhook URL secure - anyone with this URL can send data to your Airtable base.
## Step 3: Configure Surface Forms Workflow [#step-3-configure-surface-forms-workflow]
1. Open the Surface Forms Workflow Builder
2. Create a new workflow:
 ### Workflow Trigger Options [#workflow-trigger-options]
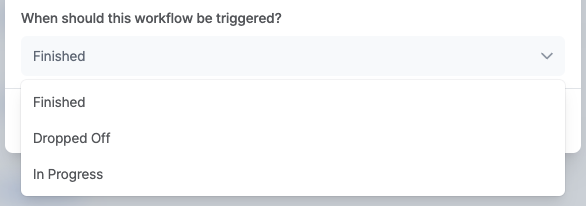
You can configure when the webhook sends data:
* On form submission
* When visitor drops off
* While form is in progress
### Workflow Trigger Options [#workflow-trigger-options]
You can configure when the webhook sends data:
* On form submission
* When visitor drops off
* While form is in progress
 ### Configure the Webhook Action [#configure-the-webhook-action]
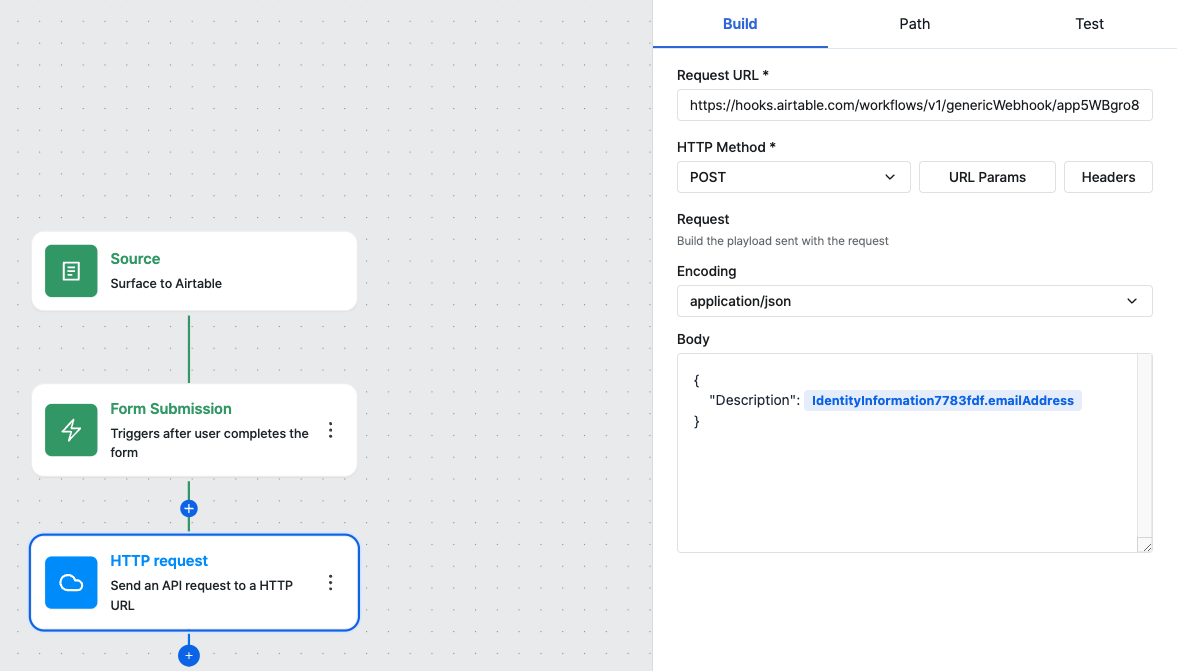
1. Click the **+** button to add a new node
2. Select **HTTP Request** from the actions menu
3. In the sidebar configuration:
* Set **Request URL** to your Airtable webhook URL
* Change **HTTP Method** to `POST`
* Under **Body**, add your JSON mapping. Where the object key is the Airtable column name and the value is the form variable.
### Configure the Webhook Action [#configure-the-webhook-action]
1. Click the **+** button to add a new node
2. Select **HTTP Request** from the actions menu
3. In the sidebar configuration:
* Set **Request URL** to your Airtable webhook URL
* Change **HTTP Method** to `POST`
* Under **Body**, add your JSON mapping. Where the object key is the Airtable column name and the value is the form variable.
 Use the `@` symbol in the workflow builder to access form variables. Press `@` and start typing to see available fields from your form.
## Step 4: Test Your Integration [#step-4-test-your-integration]
1. Submit a test entry through your Surface Form
2. Check your Airtable base for the new record
3. Verify that all fields are mapping correctly
If you don't see data appearing in Airtable:
* Check your webhook URL is correct
* Verify your JSON payload structure matches your Airtable columns
* Review the workflow logs in Surface Forms
## Need Help? [#need-help]
* Email [support@withsurface.com](mailto:support@withsurface.com)
* Book a [consultation](mailto:founders@withsurface.com) with our team
Use the `@` symbol in the workflow builder to access form variables. Press `@` and start typing to see available fields from your form.
## Step 4: Test Your Integration [#step-4-test-your-integration]
1. Submit a test entry through your Surface Form
2. Check your Airtable base for the new record
3. Verify that all fields are mapping correctly
If you don't see data appearing in Airtable:
* Check your webhook URL is correct
* Verify your JSON payload structure matches your Airtable columns
* Review the workflow logs in Surface Forms
## Need Help? [#need-help]
* Email [support@withsurface.com](mailto:support@withsurface.com)
* Book a [consultation](mailto:founders@withsurface.com) with our team